NOTE: This is part of a series covering Windows Client development. Our sample application is RMV Awesome, an ironically named Modern UI application for keeping tabs on the Massachusetts Registry of Motor Vehicles. In this article we’ll look at monetizing our creation.
Now that we have our Awesome app on both Windows 8.1 and Windows Phone 8 we should consider monetization. Monetization is the marketer’s term for “make money with this thing”. Money? Money sounds good, let’s do that.
Disclaimer: Monetization is a really complex topic and there is no one-size-fits all approach. I’ve given some advice regarding monetization on this blog. Consider how and when you monetize carefully. Now we shall carry on and ignore any advice I’ve given in the aforementioned post.
When looking at monetizing RMV Awesome it is pretty clear that the value it delivers to a user - while universally accepted as “awesome” – is not likely to justify charging users for the app. That leaves us with Free (which is where we stared) or Ad-supported. Since leaving it at free negates the need for this post, we’ll go with ad-supported. Solid logic don’t you think?
Second Disclaimer: Based on usage over the past few months I expect to make enough to retire on from this app…. so long as I can make the .6 to .10 a month I expect to get stretch really far. Advertising is a very profitable monetization model but it does require you have a user base that a) uses your app regularly and b) consists of more than a few hundred devs playing around. Just a small disclaimer for anyone thinking I’m cashing in here.
Getting Started
Since we’re targeting Windows platforms we’ll start with the Microsoft Advertising SDK which provides an ad-network control you can drop in to both Windows 8 and Windows Phone 8 apps. With that in mind you’ll want to download and install the SDKs for Windows 8.1 and Windows Phone 8.
Once you have the SDK you’ll need to register on the Microsoft Pub Center, the control center for Microsoft Advertising. Creating an account here is the first step to getting paid, it is also where we will need to register our apps and the ad units we want to deliver to them.
RMV Awesome for Windows 8
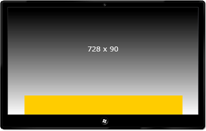
We’ll begin with our Windows app. In this app I’ve decided to show ads in two different locations. On the Branch Listing page I want the advertisement to stick to the bottom of the screen. On the Branch Detail page that would cover up information so I’ve opted to show a smaller ad in the lower right.
My first step is to go to the Pub Center and register my application. This is done by first going to the Setup Tab and then selecting “Register Application” on the page below. I’m calling this app “RMV Awesome for Windows 8” since my app has the same name on both platforms but Pub Center doesn’t allow for two application with the same name. No big deal, it is only for reporting purposes.
Once you have registered your app, return to the Setup Tab and select “Create Ad Unit” in the Windows 8 application ad units section. Here we will name our ad unit, set its size and select what category of advertisements we want to display. In this case I’m creating two different sizes, 728x90 and 250x250.


Once you’ve created an ad unit you are shown two keys: Application Id and Ad Unit Id. These two numbers will be used in a moment to link the ad control in your app to the ad unit from the pub center.
Now we can open the RMV Awesome solution in Visual Studio and ad the required reference to the RMV Awesome W8 project. Note that this should not be added to the Portable Class Library as the SDK is platform specific while the PCL is not.
With our reference in place we open BranchListPage.xaml and drop the AdControl onto the page. This will automatically add the required reference to the page. All we need to do now is set the Width and Height properties to the same size as the Ad Unit we registered and then input the Ad Unit ID and Application ID we received from Pub Center.
<a href=”

We then repeat the same process on the BranchDetailPage.xaml using the 250x250 ad unit.

That is all there is too it. Now we’ll do something very similar on the phone.
Windows Phone 8
Ad AdControl SDK for Windows Phone is very similar to the Windows 8.1 version. The primary difference is the ad unit sizes are quite different due to the smaller screen.
You will need to register a new application, this time for Windows Phone, in the Pub Center. In this case I used “RMV Awesome for Windows Phone”. With phone ad units the guidance is very straight forward - use 480x80 whenever possible. Since we try to follow that kind of clear guidance, we’ll add a single ad unit for a 480x80 ad and show that same ad unit on both WP screens.
Once we have the ad unit and application id we can move back to Visual Studio and add the AdControl to our pages. Along with adding the reference, you will also need to open your app’s manifest and enable specific capabilities that the AdControl requires. Those are outlined at http://msdn.microsoft.com/en-US/library/advertising-mobile-windows-phone-manifest-capabilities(v=msads.20).aspx.
The code for the AdControl looks almost identical to the Windows 8.1 version. There is one handy feature available on the Phone that isn’t on Windows however, IsAutoCollapseEnabled allows the ad control to auto-hide in cases where there isn’t an ad to display.


The code is available on GitHub at https://github.com/mlafleur/RMVAwsome/releases/tag/T4 or follow the live development at https://github.com/mlafleur/RMVAwsome